
약어
- rs
replicaset - svc
servicekubectl
📌 Kubernetes에서 리소스를 생성하는 두 가지 방식
- Imperative 방식 (명령형 방식)
kubectl run nginx --image=nginx처럼 명령어로 직접 리소스를 생성- 빠르게 테스트하거나, 단순한 Pod를 실행할 때 유용
- 단점: 설정을 유지하거나 재사용하기 어려움
- Declarative 방식 (선언형 방식)
kubectl apply -f pod-definition.yaml처럼 YAML 파일을 사용하여 리소스를 선언- 리소스 상태를 코드로 관리할 수 있어 유지보수가 용이
- CI/CD 파이프라인과 연동하기 좋음
create
- rs
k create -f rs.yml - deployment
k create -f deplloyment-definition.yml
- rs
run
- pod
kubectl run ngunx --image nginx
- pod
Tip. output 파일 간단 생성
https://kubernetes.io/docs/reference/kubectl/conventions/kubectl run nginx --image=nginx --dry-run=client -o yamlkubectl create deployment --image=nginx nginx --replicas=4 --dry-run=client -o yaml > nginx-deployment.yamlkubectl create deployment --image=nginx nginx --dry-run=client -o yaml > nginx-deployment.yaml- -o name, -o json, -o yaml, -o go-template, or -o jsonpath 등 output form 을 정할 수 있음
- --dry-run=client 를 사용해 명령어를 실제로 적용하지 않고 파일을 뽑을 수 있음
apply
kubectl apply -f pod-definition.yamlget
- 모든 리소스 보기
k get all - pod
kubectl get pods
- 모든 리소스 보기
describe : 세부사항 출력
- pod
kubectl describe pod [pod name]
- pod
delete : 리소스 삭제
- pod 삭제
kubectl delete pod [pod name] - replicaset 삭제
k delete rs [rs name]
- pod 삭제
replace
kubectl replace -f pod.yaml
기존 리소스를 아예 삭제하고 새로 만들어야 할 때 사용함scale
my-deployment의 레플리카 개수를 5개로 증가
2️⃣ YAML 파일을 사용하여 스케일 조정
deployment.yaml파일에서 지정된 리소스의 레플리카 수를 3개로 변경
3️⃣ ReplicaSet의 레플리카 개수 조정
my-replicaset의 레플리카 개수를 4개로 변경
4️⃣ StatefulSet의 레플리카 개수 조정
kubectl scale deployment my-deployment --replicas=5kubectl scale statefulset my-statefulset --replicas=2kubectl scale rs my-replicaset --replicas=4kubectl scale -f deployment.yaml --replicas=31️⃣ Deployment의 레플리카 개수 조정
edit
사용되고 있는 리소스를 직접 편집k edit rs [rs name]
YAML
Pod 기본 필드
apiVersion:
kind:
metadate:

spec:- apiVersion
k8s 버전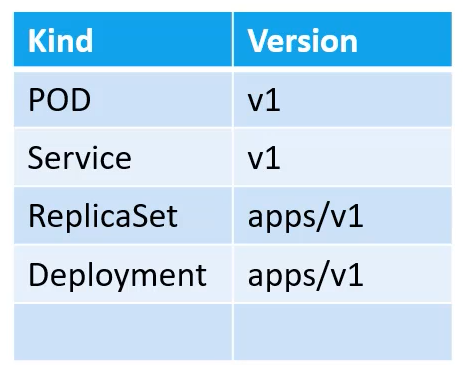
- kind
- metadata
- label: pod 필터링을 하는 라벨
metadata: name: myapp-pod labels: app: myapp type: front-end- spec
- containers 은 List 이므로 하위 항목 열거 가능
대시(-) 는 List 의 아이템임을 뜻함
- containers 은 List 이므로 하위 항목 열거 가능
spec: containers: - name: nginx-container image: nginx
ReplicationController 기본 필드
Replicaset 기본 필드

- selector : 라벨 등을 이용해 pod 를 식별할 수 있음 (replicaset 이 생성되기 전에 만들어진 pod 또한 관리하에 둘 수 있음)
rc와 가장 큰 차이점
Deployment 기본 필드

Replicaset 과 유사함
Replicaset 을 자동으로 생성함
service 기본 필드
NodePort
apiVersion: v1 kind: Service metadata: name: my-service spec: type: NodePort selector: type: front-end ports: - port: 80 # By default and for convenience, the `targetPort` is set to # the same value as the `port` field. targetPort: 80 # Optional field # By default and for convenience, the Kubernetes control plane # will allocate a port from a range (default: 30000-32767) nodePort: 30007- ports 는 list 임
서비스 하나에 포트 매칭이 여러개 가능함 - selector
port 만 설정하는 것으로는 부족함. 80 포트로 서비스하는 앱이 수십개 이상일 수 있기 때문- Pod 의 metadata 에서 설정한 labels 을 사용함
k get service- NAME TYPE CLUSTER-IP EXTERNAL-IP PORT(S) AGE
my-nodeport-service NodePort 10.100.200.1 80:30080/TCP 5m - 🧐 PORT(S) 항목 분석 (80:30080/TCP)
- 필드 의미
- port (80) Service의 포트 (Cluster 내부에서 접근할 때 사용)
- nodePort (30080) Node에서 개방된 포트 (외부에서 :30080으로 접근 가능)
- targetPort (8080, kubectl get service에는 직접 표시되지 않음) 실제 Pod 내 컨테이너가 LISTEN 중인 포트
- 필드 의미
- targetPort 값을 직접 확인하려면
kubectl describe service my-nodeport-service - 외부에서 해당 pod 에 접근하려면?
http://:30007 → (서비스) → http://PodIP:80으로 트래픽이 전달
- ports 는 list 임
ClusterIP
apiVersion: v1
kind: Service
metadata:
name: my-clusterip-service
spec:
type: ClusterIP
selector:
  app: my-app
ports:
  - port: 80
    targetPort: 8080
- LoadbalancerapiVersion: v1
kind: Service
metadata:
name: my-service
ports:
- port: 80
targetPort: 9376
```